Basic Image
Building in the WCMS
Understanding Image “Type”
Any image uploaded to the WCMS is reusable and can be inserted into content as “image only,” image with caption (jumbotron), or photo box. When inserting an image, select “Image” as the element type and then, in the Settings pop-up, select one of these three display styles as its “type.” The display options vary according to the type.
For details on maintaining and using images, refer to the topics on this page.
Uploading Images
From the WCMS content browser, there are two approaches to uploading a single image or multiple images in bulk:
- Select the parent folder and then drag the image files into the content item list area on the right.
- Select the parent folder and then click “New Content.” When prompted, select “Images/Files” as the content type.
Note that, when you are selecting an image for placement on a page or in a content element such as a card, you can upload images.
- Click the “Select” button for the image field to open the Content Item Selector.
- Click the “Upload Image” button in the upper right corner of the Content Item Selector.
- Once you have added the images (and completed any bulk edits), click “Finished Uploading” in the upper right corner of the selector to return to the previous form and finalize the image selection.
Editing During Upload
During the image-upload process, you can bulk-edit the titles, alt text, and captions. As images are selected or dropped into the file selector, the WCMS compiles the images into a list.
Click the “Bulk Edit” button just above the list of uploaded images to turn on the inline editor for the images. (Note that there is no save button. Any changes to the titles, alt text, and captions are stored automatically.)
Editing After Upload
Once images are uploaded, you can access them individually from any browser (the main content browser, search results browser, relationships browser) by clicking the “Edit” link for the image when you hover over its title.
To crop or scale an image, open the image for editing and then click the “Edit Image” button just under the image preview.
Handling Alt Text
In most cases, when a user inserts an image into a page, he or she can edit the alt text (as well as title, caption, and a few other fields) for the specific location. However, in some cases — such as the page Feature Area — the alt text must be pulled from the saved image content item. For this reason, it’s always best to provide good alt text in the image content item.
Inserting an Image
Once you upload an image, you can insert it into Visual Composer or any WYSIWYG field:
- Select the “New Element” option to open the Image Settings pop-up.
- Select the image and define its usage-specific properties. In most cases, you can select from multiple image sizes. Always select the smallest size that works for your location and need.
- Use the “Type” field in Settings to specify the use of the image: image only, image with caption (jumbotron), or photo box.
- To constrain image size within a WYSIWYG field (typically for wrapping text around an image), in the Settings pop-up, set the Alignment field and then the Width (Grid Columns).
- To always pull the image title, caption, etc. from the saved image item, check “Pull image information dynamically” in the Settings pop-up. (Once you publish the page, if the image is edited, the page publish status changes to “Edits Not Published,” and you should re-publish the page.)
Note that, in some cases, like the Iconic Image and Feature Area for a page, you do not have the option of setting the image properties specific to the page.
Large Image Viewer Display Options
If you add a caption in the Edit Media page for an image, you can choose to display that caption on the page with the image, in the large image viewer, or both.
- The “Image with Caption” style must be selected as the Image Type in the image settings window.
- Check the pull image information dynamically box under general tab to connect to the image caption content.
- Select the large image viewer option on the advanced tab of the image settings.
- Then select which viewing option you want from the caption location dropdown below.
- The title can be displayed in the large image viewer modal as well if the show title box is selected from the general settings tab in the image settings window.
Replacing an Image
“Replacing an image” as the expression is used here involves editing the reusable image item. This kind of image replacement — as opposed to merely switching out an image inserted on a page — changes the image in all locations where it is used. Generally, you should replace an image with an image of the same size and dimensions. The purpose of the replace-image option is to change the content of the image.
- From the content browser, open the image for editing.
- In the upper right corner of the Edit Media form, click the “Replace this Image/File” button.
- When prompted, select a replacement image and click Submit.
Do not change the image file name unless you know that the image is not in use.
Images in Alternative Languages
For a single image, you can provide alternative title, alt text, and caption in any of the standard languages supported in the page Language selector:
- Open the image for editing.
- In the Translations section, select a language in the Language drop-down. Then complete the Title, Alt Text, and Caption.
- To add these fields for another language, click the button “Add Another Translation.” (To remove, click “Remove Translation.”)
When inserting into a page where you want the image’s alternative-language fields to be used, make certain the page Language is set to the appropriate language and save the page. Then insert the image.
WCMS users can select images from the DAM repository using the DAM Assets tab in the Content Selector tool. If you’d like that feature turned on for your site, let us know in a JIRA Ticket.
You can bulk-upload images (up to 49 MB total). In the content browser, just drag and drop image files into the item list (right side).
You can bulk-edit image titles, alt text, and captions immediately after uploading. Click the “Bulk Edit” button above the list of uploaded images.
Depending on the size of the original image, the WCMS automatically creates up to four additional sizes or “renditions” of the image. When you insert an image into a page or content element, select the smallest size for the location and need.
To change the content of an image in all places where it’s used, open the image for editing (from content browser) and click “Replace This Image/File” in upper right corner of Edit Media form. For more details, see the instructions on this page.
As of the 4.22.7 WCMS release, you can submit a JIRA ticket to request the ability to add imagery into a WCMS module directly from the Digital Asset Management (DAM) tool. The DAM tool is currently in pilot, though 1800+ images have already been included for immediate WCMS access.
There are several benefits of using this method:
- The content is searchable using tags and ownership information
- Metadata and taxonomy information associated with the image in the DAM transfers to the WCMS
- Usage tracking information comes along with the image

Using the DAM Assets Tab
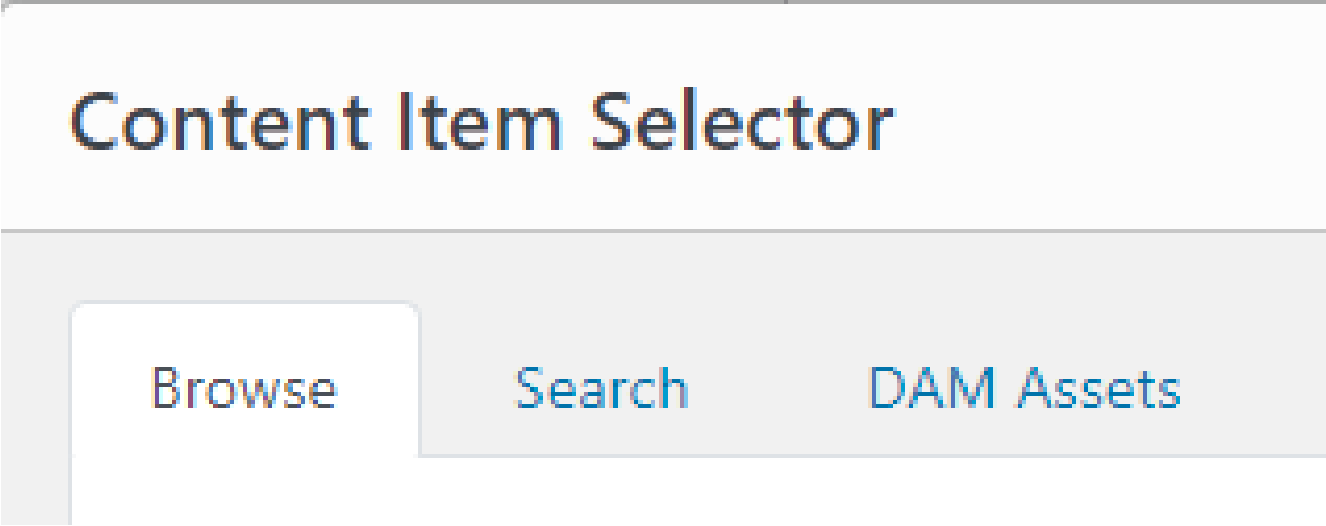
When adding an image into a module in the WCMS, you’ll end up in the Content Item Selector. The third tab is for adding “DAM Assets”.
Selecting this tab allows you to access images and elements from the Digital Asset Manager (DAM).
Standard Search
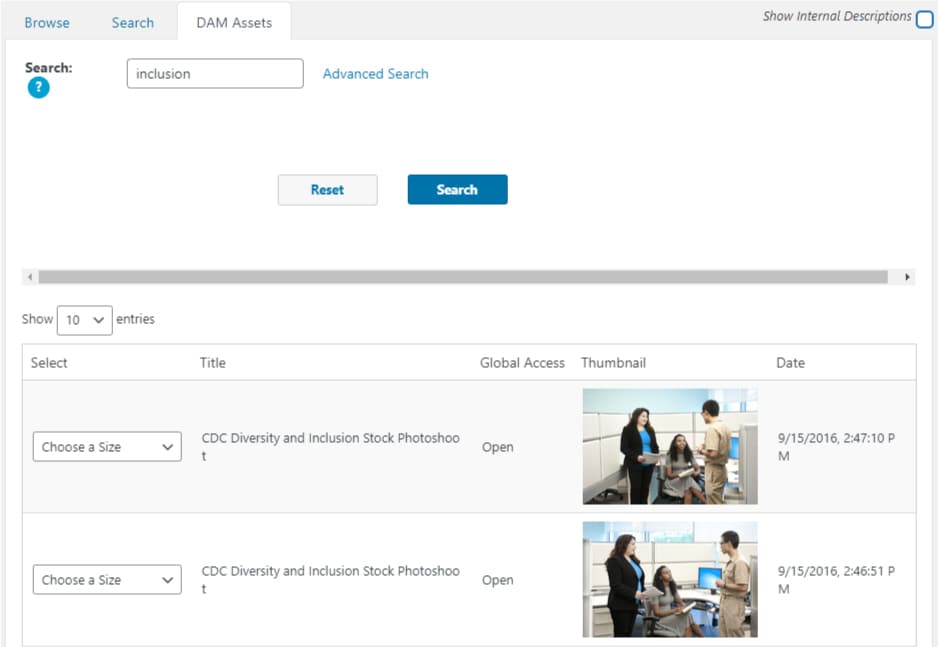
Once you’re in the DAM Assets screen, the simplest way to look for images is using the Search Field along the top.
The DAM will provide any images that follow the search criteria that you entered. The results will appear in the selection window below that tells you information about the image with a preview.
You can select an image to add to your page just like you would in the standard Content Item Selector browse tab.


Advanced Search
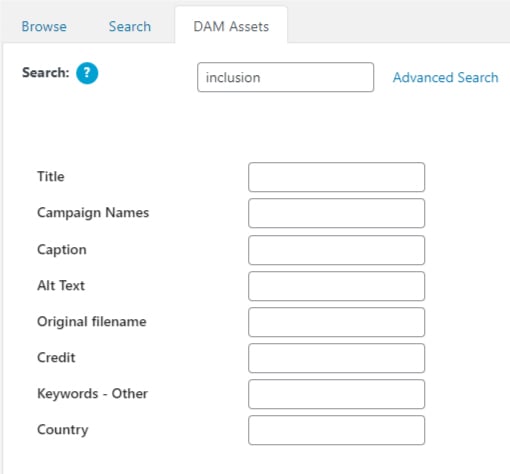
If you are looking for an image with specific information the “Advanced Search” can be used to narrow the results that are displayed.
These search criteria include filters like: Title, Campaign Names, Caption, Alt Text, Original filename, Credit, Keywords – Other, Country, and Owner / Manager.
You can select an image to add to your page just like you would in the standard Content Item Selector browse tab.