Purpose
SAS Studio is a good option for querying data on the BioSense Platform's DataMart. This step-by-step guide offers instructions and code examples.
The process
In addition to using Posit Workbench (formerly called RStudio), you can do all your SQL queries on the BioSense Platform by using SAS Studio. Here are some easy steps to follow and code examples for querying data on the BioSense Platform’s DataMart.
First, run the User_Info program. Then log in to your SAS Studio account using your Access & Management Center (AMC) username and password.
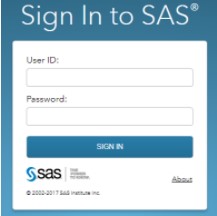
If this is the first time you've accessed SAS Studio on the platform, follow all instructions in Section 4 of the SAS Studio User Manual before proceeding.
Next, run the User_Info Program in SAS. Open a new tab to create a New SAS Program by clicking New Options at the top of the menu and selecting New SAS Program, or press the F4 key.

This creates a new tab, titled Program 1.
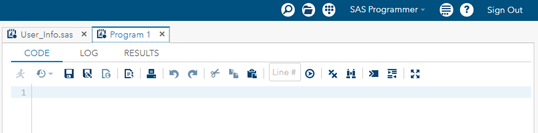
Copy and paste the code below into the new Program 1 tab.
To run pieces of code, highlight the code in your script and press F3. Or, click the Run All or Selected Code button.
Copy and paste the code below to create a database connection to the BioSense Platform's Analytic DataMart.
Options source source2 mprint mlogic symbolgen notes nocenter dlcreatedir errors=1 compress=yes;proc datasets lib=work nolist kill;%include "/opt/sas/shared/homes/&sysuserid./User_Info.sas";proc sql noprint ;%include "/opt/sas/shared/homes/%scan(&sysuserid.,1,@)/User_Info.sas";
connect to odbc (datasrc='BioSense_Platform' user=&UserID. password=&PW.);
The last step is to write your SQL query and send it to the database. To do this, copy and paste the code below to SAS:
select *
from connection to odbc
(SELECT *
FROM Except_Reasons);
disconnect from odbc;
quit;
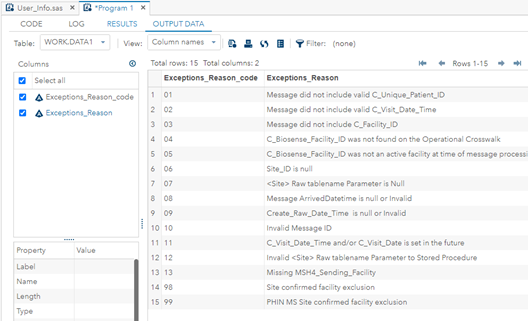
This example pulls information from the Except Reasons table, but you can insert any SQL query you'd like inside the parentheses. Once the query is complete, the table of query results will appear in Output Data.
To write the output to an Excel file for download, add the following lines:
libname xlout XLSX “/opt/sas/shared/homes/&sysuserid./SAS_Output.xlsx”;data xlout.data1;
set work.data1;
run;libname xlout clear;
This will provide a file named “SAS_Output.xlsx” in the left pane under Server Files and Folders -> Files (Home) that you can right click on and Download.
And that’s it! The code shown below is enough to get you started reviewing your data in SAS Studio.
proc datasets lib=work nolist kill;%include “/opt/sas/shared/homes/&sysuserid./User_Info.sas”;
proc sql noprint ;
%include “/opt/sas/shared/homes/%scan(&sysuserid.,1,@)/User_Info.sas”;connect to odbc (datasrc=’BioSense_Platform’ user=&UserID. password=&PW.);create table work.data1 as
select *
from connection to odbc
(SELECT *
FROM Except_Reasons);
disconnect from odbc;
quit;libname xlout XLSX “/opt/sas/shared/homes/&sysuserid./SAS_Output.xlsx”;data xlout.data1;
set work.data1;
run;libname xlout clear;

